#ts3 blender
Explore tagged Tumblr posts
Visit Tumblr Blog
Explore Tumblr blogs with no restrictions, modern design and the best experience.
Last Seen Tumblr Blogs


Fun Fact
In 2020, 27% of US Tumblr users had an annual household income of over $100,000.
Text

It's BIG.
It's BLUE.
It's UPDATED.
Hiya Simblr, it has been a while. I have a big update today- it's one of my oldest guides on MTS, but new and blue! The changelog is in the MTS comments- but the short and sweet is that two years of learning Blender has been squeezed in there for your convenience, complete with graphics and GIF examples.
ModTheSims tutorial Google Docs tutorial Blender Templates

#on a mission to become a human tutorial hub#i follow predominantly ts2 blogs and feel like an infiltrator posting about simcethri#simblr#ts3#the sims 3#ts3 cc#ts3 tutorial#ts3 blender
180 notes
·
View notes
Text

TS3 l ARIANA GRANDE MUGLER 83´SATIN GOWN
HQ Mod Compatible.
Recoloreable (2nd Swatch)
Full Body Category.
Custom Thumbnail.
Don't re-upload or claim as your own.
Don't modify without permission.
DOWNLOAD
#ts3#s3#ts3cc#s3cc#cc finds#custom content#ts3 clothing#ts3 cc#ts3 download#ts3 screenshots#ts3 simblr#sims 3#sims 3 simblr#ariana grande#wicked the movie#wicked#ts3 blender
71 notes
·
View notes
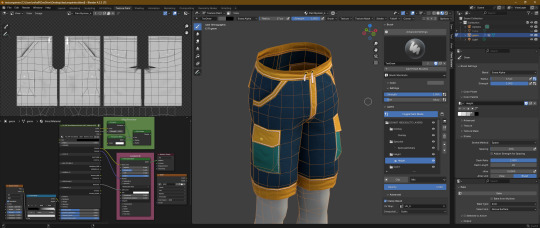
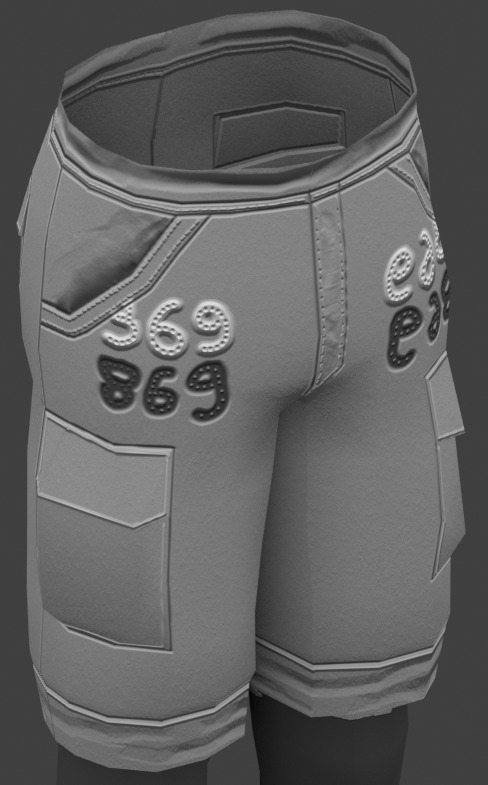
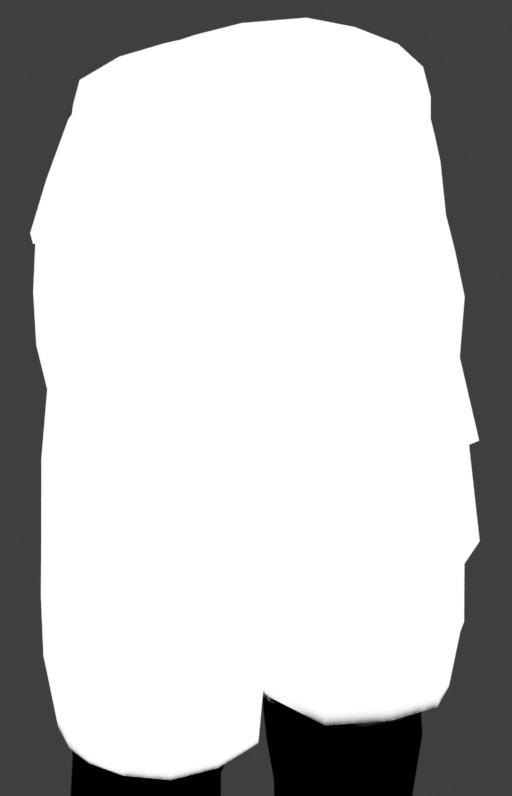
Text
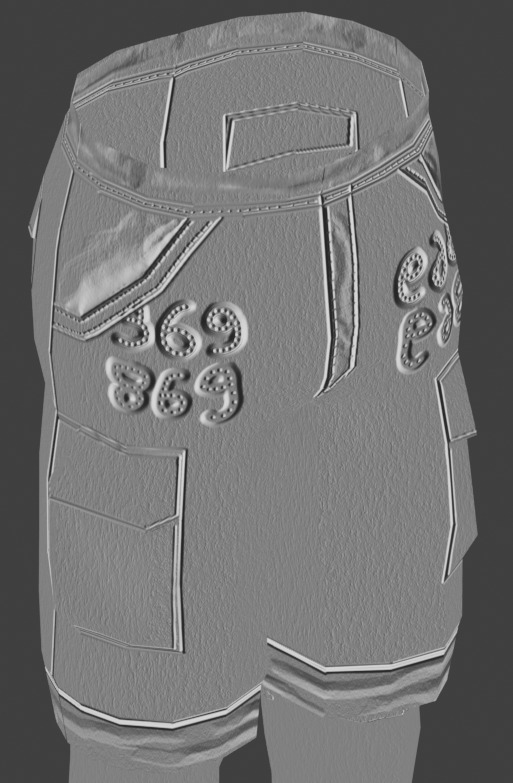
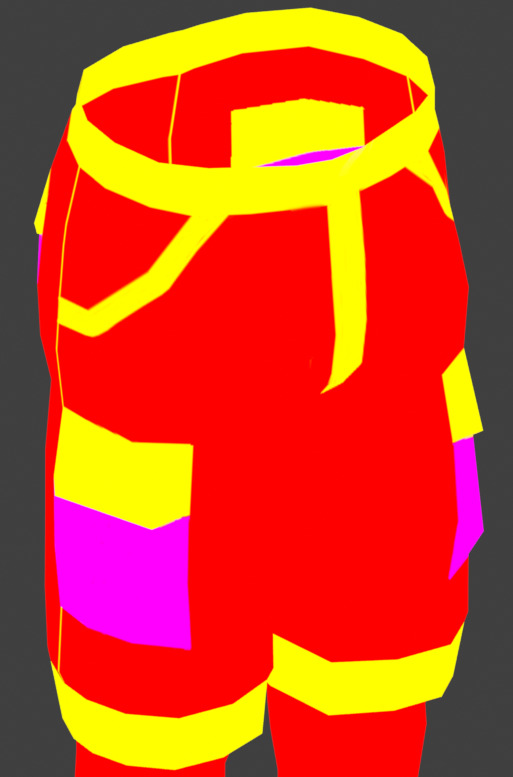
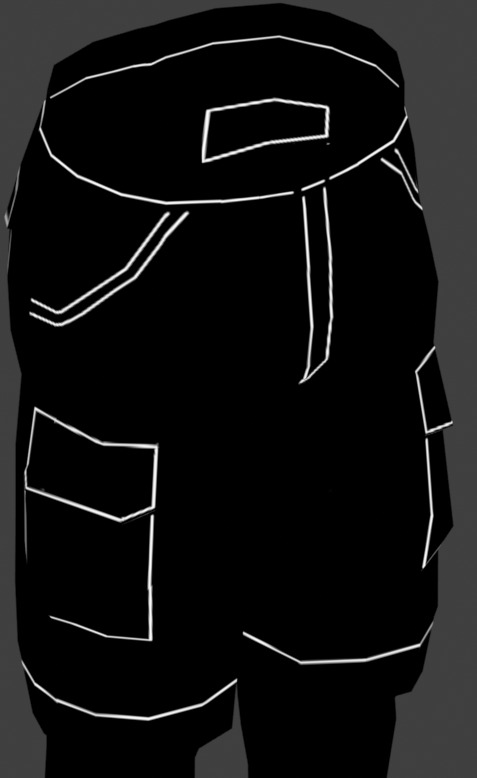
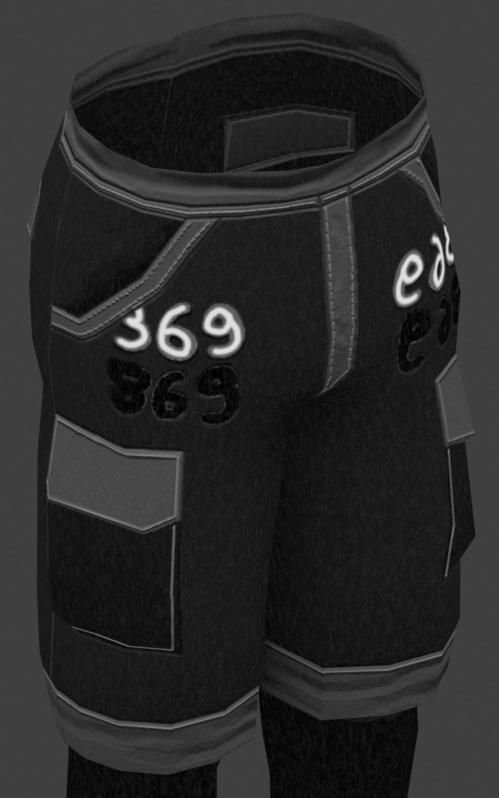
The Sims 3 Material Painter Final Version
UPDATE
I've updated the painter, and with it, included some new things as well as a fully interactive tutorial on how to use it.
NEEDED Prerequisites:
Blender 4.2+
Blender Paint System Addon - HERE (you can donate to the original creator, or get it for free, great little plugin!)
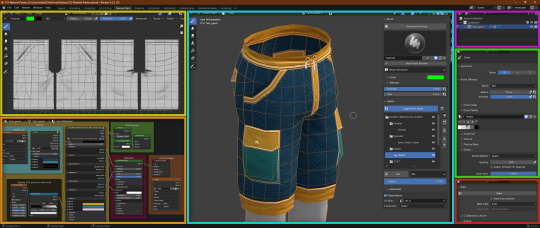
THE TUTORIAL
The tutorial is extensive, done in numbered steps, and is UI and workflow oriented, allowing you to click on any relevant UI element to learn more about it, and how it relates to the complete workflow. There's an additional, advanced chapter, for people who are interested in learning more about blender texture painter's functionality and techniques.
PAINTER ADDITIONS
The Painter has been slightly fixed, with multiplier's lines and depth shading being shifted to the correct depth, and with AO being more pronounced. This will make multiplier output even more accurate. Added some new minor tweaks to UI and Color Palettes to accommodate for the tutorial.
DOWNLOAD
Get updated templates with new files HERE!
If you only want to access the tutorial, you can do it HERE.
You can access the original post below:
Been working on a tool that easily creates The Sims 3 material maps based only on a few texture layers, most of it derived from height data. This was done long time ago, but very sloppily, and it was not at all approachable.
Discovering THIS free blender add-on that lets you plaint layers in it, made me return to this project and finalize it for release.
The tool can export:
- Multiplier, RGB+A
- Normal Map, RGB+A
- CAST Map, RGB+A
- Specular Map
- Overlay, RGB+A

OLD VERSION BELOW!
//~~Get it HERE, and please, make sure to get THIS blender plugin, it's NEEDED for this to work. Blender 4.2+ is also needed for these to work together.~~//
#thesims3#thesims#sims3#thesims3cc#the sims 3#sims3mods#ts3#sims 3#sims3tools#thesimstools#simsc#simscreation#sims creator#blender#blender3d
173 notes
·
View notes
Text
CC Creation Tutorial: Smooth Seams in Blender

In this tutorial, I will show you how to make your mesh seams smooth inside Blender (no Milkshape required!) and walk you through the process step by step. We will make a perfectly smooth mesh and transfer the normal data from that mesh to our main mesh using the Data Transfer modifier.
I am using Blender 3.6 in this tutorial (though you should be able to follow along using other versions as well)
You do not need to have much previous knowledge to follow this tutorial, but I assume you know some basics in Blender like how to select, things, navigate around, etc, and know how to import the meshes and put them into Blender.
For this tutorial, I exported the Sims 3 afbodyEP4DressPromBigBow mesh with TSR Workshop. You can use any clothing mesh you like though, and works on any meshes, not just Sims 3 ones.

This is our mesh. You can already tell that it has the dreaded seams on the neck and the rest of the body.

First, we need to make a copy of the mesh (in Object mode, select the mesh and hit Ctrl+D Shift+D to duplicate it, then hit Esc to stop it from moving around).
Rename the mesh (I added Seamless to the mesh name).
Make sure the original mesh is hidden (click the eye symbol) and select the Seamless mesh.
Press the Tab key to go into Edit Mode.

Now we select the parts that we want to have smooth seams. Let's select everything that is skin (you can select a litte piece of the mesh and then press Ctrl+L to select the entire piece)!

Now, press M and in the menu, choose By Distance. (in older versions, this is called Remove Doubles).
This will remove all double vertices at the seams on the selection we made.

It will show you how many vertices it removed. The skin looks nice and smooth!
Let's switch back to our original mesh: Make sure you deactivate the eye on the Seamless mesh and activate the eye again on the main mesh. Then, select the main mesh.

Now, let's add a data modifier to our main mesh. Click the blue wrench icon in the vertical list of the properties panel and then onto Add Modifier, then choose Data Transfer from the list.

As the source, we choose our Seamless mesh.

Also toggle on Face Corner Data and click the Custom Normals button.
Hold on, there is a message saying that we should enable Auto Smooth in Object Data Properties. Let's do that next! (if the message does not appear for you, maybe Auto Smooth is already on).

Click the green inverted triangle button and in the Normals section, toggle on Auto Smooth.

Now we can switch back to the modifier tab by clicking the blue wrench icon again.
But hang on, what happened to our mesh? There are now black spots over the dress and shadows on the legs!

This is due to the Data transfer modifier's Mapping setting. If we change it to Topology, our mesh goes back to normal again. Phew!

Now that the normals look good, we can start the transfer of our new smooth normals from the seamless mesh to our main mesh. To do that, we hit the Generate Data Layers button. This button works destructively, so you cannot undo what it did, just FYI.

Note: On newer versions of Blender, Generate Data Layers may not be enough to transfer the normals and you may need to apply the modifier instead.
You can toggle the modifier's visuals on and off with the little screen icon to see the results after you click Generate Data Layers to see if it stuck. If it did not (and you see the seams of your base mesh when toggling it off), try to apply it instead.

I switched from textured to solid shading because the differences are just more noticeable in this mode. This is how our mesh looks now with the modifier turned off.
Because we clicked the transfer button, the normals have been permanently applied to our mesh. The skin is smooth now, and so is the dress (even though we did not smooth that one, hmm...)

If we toggle the modifier back on, suddenly the dress has seams again! What's going on there? I'm not exactly sure why, but Auto Smooth seems to be doing some smoothing on the dress mesh as well.
I am not sure if this is normal behavior or not, but let's pretend that this did not happen and the modifier in fact did not smooth the dress.
Maybe we just forgot to smooth some areas on the Seamless mesh that we noticed only later on. That's no problem. We simply modify our Seamless mesh again!

So let's swap back to the seamless mesh and select it (remember to click the eye icons so only the Seamless mesh is visible).

Let's select the main dress parts and press M -> merge by distance on them. We cannot smooth the whole dress all at once, because then that would remove some seams that we want (like those for the backfaces and the middle section of the dress where the bow is attached).
If we remove the wrong seams, we ruin our normals and will have black splotches.

Now, let's select the backfaces and areas we left out before and repeat this process: M -> merge by distance.

Look at how perfect our Seamless mesh is looking now! Now, let's transfer those beautiful normals to our main mesh.
Select the main mesh and toggle the eye icons again, to hide our Seamless mesh and reveal our main mesh.

Once again, we will use the Generate Data Layers button in our Data Transfer modifier. If you have previously applied the modifier, just add the modifier again to the main mesh and use the settings shown here.
And that's it, you are done! You have a perfectly smoothed mesh that you can export now.

Final Note: it is best to transfer the normals at the very end of your meshing process because any action that recalculates the normals can reset our custom-made smooth normals again.
Of course, you can simply use the Generate Data Layers button again to re-add them, but it saves you time to only do this step at the end.
I almost forgot to say: You still have to use Mesh Toolkit to fix the seams on the edges of your mesh and do the usual shenanigans.
149 notes
·
View notes
Text


M A N O R |
I went digging through my old backups to find a house I'd built years ago for my sims 3 story family, the O'Donnaghailes. the house exterior was based off of Lallybroch (Midhope Castle). I've updated the outside a bit and started decorating the interior in the vein of a Scottish/Irish manor house to keep in line with the story vibes. sometimes I think about resurrecting that story, but I just don't think I could ever get along with sims 3 well enough to pull it off, and porting it to sims 4 would lose the heart and soul, which was Rinn Fada and Glen Donnach being the original inspiration. for those interested, the original story was posted here. does make me a bit nostalgic about when I used to do prose on simblr.
#ts3#sims 3#ts3 interior#ts3 decor#sims 3 aesthetic#honestly it's not even the instability that puts me off#it's the lack of sims4studio and the blender rigs for posing#if making poses for ts3 was more streamlined I'd bring it back in a heartbeat#anyways I'm kind of away until the first#so hope everyone has a good easter!
156 notes
·
View notes
Text


few things i've been working on lately!
63 notes
·
View notes
Text

<33
81 notes
·
View notes
Text


Goodbye to this year and the gingerbread
12 notes
·
View notes
Text
How to Generate Mask with Blender
A quick way to help TS3 creators to arrange the mask with immediate result so they don't have to adjust everything back and forth. Especially useful with mesh of details or complicated structures.
Demo with both Blender 2.78 & 2.90
Please be noted: This video tutorial is not a step by step one. It will only show you how to use the material to generate the mask for recolorable obj. Basically it's similar to the process of baking multiplier with blender, only this time, we bake the "material" (diffuse). I will not introduce or explain RBG mask and how to bake multiplier, or even how to make your cc recolorable in the video.
For the color materials, you can download mine or create on your own. Just make sure the colors are correct.
>>My Mask Group
It's been ages since I release anything. Besides, the video was recorded before my latest hiatus. Please let me know if there's anything wrong.
106 notes
·
View notes
Text


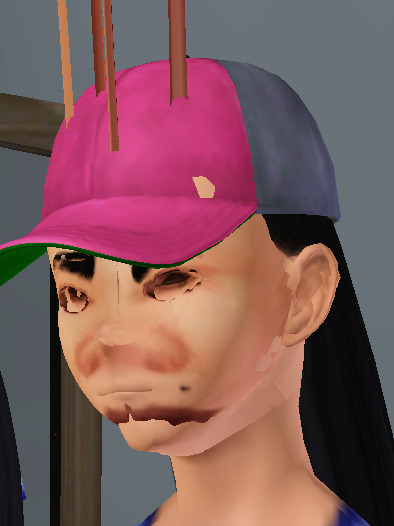
Had to dress Mei as Black Lady oof
Dress and accessories are from SilverMoonSims ❤🌙
#sims 3#the sims 3#ts3#simblr#sailor moon#black lady sailor moon#chibiusa#yes I really love pink haired magical girls#when i learn how to make buns in blender I'll edit this hair
36 notes
·
View notes
Text

TS3 KAROL G VMAS 2023 "OKI DOKI" OUTFIT
Hi! ,another TS3 release ,thank you so much for supporting me <3
Swimsuit is located in top category
Skirt is located on bottom category
(THIS IS A TS3 RELEASE)
DOWNLOAD
#ts3#s3#ts3cc#s3cc#ts3 simblr#ts3 blender#ts3cc download#ts3 screenshots#ts3 cc finds#ts3 clothing#karol g
155 notes
·
View notes
Text
Oops...

Part of me wants to publish it.... because Spooky season... lol
9 notes
·
View notes
Text


yea whatever man
#non cc posting#txt#body horror cw#ts3#THE FACT THAT THIS TURNED OUT SO SO MUCH BETTER FOR A FIRST PASS AND FIRST MESH IMPORTED INTO TS3 EVER. BAFFLES ME#IM LIKE. WOW THAT WORKED?#obviously the textures are fucked up and the lack of eyes etc etc but. dude we are so back#well not really i need to get fucking vsync or something in this bc it nearly melted my pc#my nasa ass pc that can render crazy blender shit
9 notes
·
View notes
Text

From Ryan & Selene’s 2024 nude beach trip
-
@walkingdeadlightsimmer
#au ryan raghnall brady#au ryan brady#au Ryan#au combined legacy#au collab#Ryan and Selene#my ocs#my oc edits#my ocs are my children#sims#my sims#my oc#my ocs are my babies#blender render#blender#sims 3 blender#s3 render#s3 blender#the sims 3#sims 3#sims 3 pictures#sims 3 edit#sims 3 family#sims 3 screenshots#sims 3 story#sims 3 legacy#sims 3 blog#sims 3 simblr#ts3 story#ts3rp
9 notes
·
View notes
Note
📩 Simblr question of the day: What are some of your favorite behind-the-scene screenshots? I'm throwing this out to gameplayers, storytellers, renderers and the like :)
answer in whatever way is most comfortable for you and feel free to share this SQOTD around, make sure to use the hashtag SQOTD and tag me in separate posts ~ 💛
thank you sm for the ask! this one is so fun i have so many extra fully edited pics i've just never posted lmaooo


+bonus blender pics


#ask#simblr-question-of-the-day#sqotd#just finished writing a new scene with ACTIONNN#gonna be in blender for like 2-3 business days making poses...#ts3#pepper#nilla#alex#vlad#daya
15 notes
·
View notes
Text
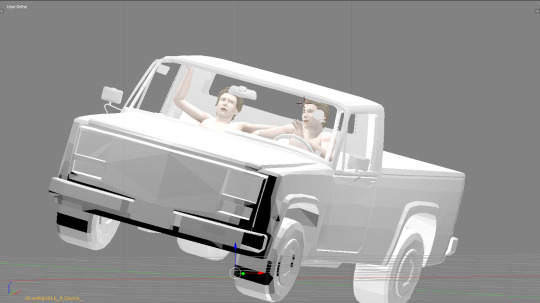
Back to the Drawing (Pose) Board!
Yes, as hard as it is to believe, in a past life I used to make poses for The Sims. But not Sims 3 or 2...wait for it...Sims 1. (*cough cough* *crickets*)
I was so into worldbuilding and other things playing Sims 3 that I didn't even consider pose making. But now that I've caught the machinima/screen taking bug (thanks, Reshade), I decided to pick this up again.

NGL, it was a tremendous pain getting back into pose making, because all of the tutorials and in some cases third party tools are horribly outdated. On top of everything else, Blender is a PITA because apparently, it keeps changing core features and the GUI every other release. What this means is that no matter how well written or updated all the tutorials and tools are, there's always a stumbling block.
Anyway, after installing, reinstalling and reinstalling 15 million versions of Blender this past week and doing this a couple of times...

...the sweet spot seems to be Blender 3.6. However, there are still issues. Luckily, there are handy workarounds.

So, right now, I am able to get poses and props using Blender 3.6, Lazy Duchess's update to Sims 3 CLIP tools, TSR Workshop (because importing props don't work using CLIP) and my own update to rigs with textures more or less intact.
If anyone's curious in a full blown tutorial using Blender 3.6, just let me know. Only asking because I don't know if there are enough players interested enough in pose making for TS3 or if the ones who are still making them want to stick to Blender 2.6/2.7.
2 notes
·
View notes